Banana Monkey Destruction Upgrades & Stats
Every shop line explained: what it modifies, when it matters, and how it interacts with the daily free trainer.
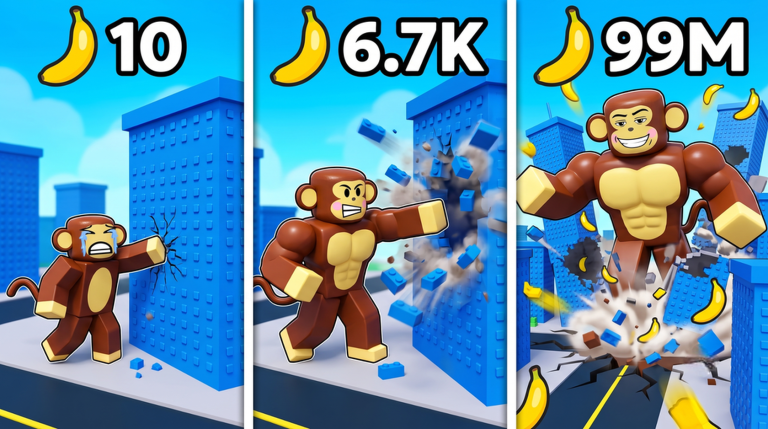
The upgrade shop is where +1 Banana Monkey Destruction turns punching into exponential growth. Kaboom Creations spreads power across several stat lines—punch damage, banana multipliers, size, destruction radius, and quality-of-life automation—so players feel constant choice pressure. This guide defines each category, links to tier rankings, and explains how the daily free trainer skews short-term value.
For buy order, read Upgrade Priority and Early Game Tier List. For currency fundamentals, see Bananas.
Punch power
What it does: Raises damage per punch against destructible objects. Higher punch values reduce time-to-break on high-health props in advanced world zones.
When it matters most: Zone transitions where object health jumps faster than your current break speed. Symptoms: punching the same object for five-plus seconds while teammates clear theirs in two.
Synergy: Pairs with destruction radius when clusters group many low-health objects—one punch applies full damage to multiple targets if radius procs overlap.
Trap: Maxing punch while banana multipliers lag behind. You break objects slightly faster yet earn fewer bananas per break relative to cost spent.
Banana multipliers
What it does: Multiplies banana payouts from destroyed objects. Often the quietest UI line but the strongest long-run compounding stat.
When it matters most: Entire early and mid incremental curve. Upgrade Priority ranks multiplier tiers S-tier for this reason.
Synergy: Stacks with trainer buffs and bonus proc upgrades. Claim trainer before evaluating multiplier ROI in Banana Calculator sessions.
Trap: Ignoring multipliers because punch numbers have bigger font sizes in shop UI mockups.
Size and reach
What it does: Increases avatar scale and sometimes interaction reach. Required for certain map gates—objects or zones that ignore undersized monkeys.
When it matters most: When progression stalls despite adequate punch income, and the map hints at size requirements (blocked paths, immune structures, faded interaction prompts).
Synergy: Visual feedback motivates new players; pair size purchases with confirmed gates, not vanity alone.
Trap: Overspending on size tiers because growth animations feel rewarding—documented heavily in Early Game F-tier habits.
Destruction radius / splash
What it does: Extends punch impact to adjacent objects. Value depends on prop density in your farming route.
When it matters most: City zones with tight building clusters. Weak in sparse outskirts where targets stand isolated.
Test: Compare BPM in your usual spot before buying—see Banana Calculator.
Auto punch and automation (in-game)
Some incremental Roblox titles sell or unlock auto punch style upgrades that swing without held input. When Banana Monkey Destruction exposes these in the legitimate shop, treat them as quality-of-life with measurable BPM impact—ranked A-tier in Upgrade Priority once income baselines exist.
Players also search for Auto Punch, Auto Upgrade, and Auto Rebirth features in external scripts. Those claim similar outcomes via executors but violate Roblox Terms of Use and risk moderation strikes—covered honestly on Scripts Hub without endorsing them.
Daily free trainer
The trainer is not a permanent upgrade purchase—it is a recurring claim that boosts session output. Typical pattern in early access incrementals:
- Button visible in hub or shop area.
- Once per real-day reset (verify in-game timer text).
- Applies temporary multipliers to punch, bananas, or both.
Best practice: Claim before upgrade shopping. A multiplier tier bought under trainer buff pays back faster, but benchmark comparisons must note buff state.
Missed days: Trainer does not stack infinitely; missed claims are lost opportunity, not lost currency. Return next day rather than chasing risky shortcuts.
Rebirth-adjacent upgrades
Young incrementals often tease rebirth or prestige resets that wipe some progress for permanent multipliers. Kaboom Creations may adjust formulas while the game is new. Until Updates document stable rebirth math:
- Treat rebirth investments as D-tier speculative in Upgrade Priority.
- Prioritize measurable BPM growth over reset fantasies.
- Revisit this section after patch notes confirm permanent bonus tables.
Upgrade UI navigation
Shop layout may group stats by tabs or scrolling lists. Controls documents platform-specific navigation. General tips:
- Read tooltip text for multiplicative vs additive wording.
- Compare price to current BPM-derived minutes-to-afford.
- Buy one tier at a time when testing efficiency.
Spending framework
1. Identify bottleneck (income / punch / map gate)
2. Consult tier list rank for that stat
3. Buy single tier
4. Re-test BPM or zone break speed
5. Repeat
Avoid bulk-buying five tiers before measuring—if a patch nerfs a stat line, you want small exposure.
Related pages
- Bananas — currency funding upgrades
- World Destruction — why punch gates exist
- Tier List Hub — ranked recommendations
- Systems Hub — loop context
Frequently Asked Questions
Quick answers to the most common questions.
Which upgrade should I buy first as a new player?
Alternate banana multipliers and punch power until income stabilizes, following Early Game tiers. Claim trainer first if available.
Does the trainer replace multiplier upgrades?
No. Trainer is a temporary boost; multiplier tiers permanently raise baseline BPM.
Are paid Robux upgrades covered here?
This page focuses on shop stats visible to free players. Paid boosts may accelerate pacing but do not change relative priority logic.
How do I know if an upgrade is additive or multiplicative?
Read in-game tooltip wording and test with BPM math. Multiplicative lines explode late-game; additive lines feel linear.